Admin Guide
 Automated Notification Template Management

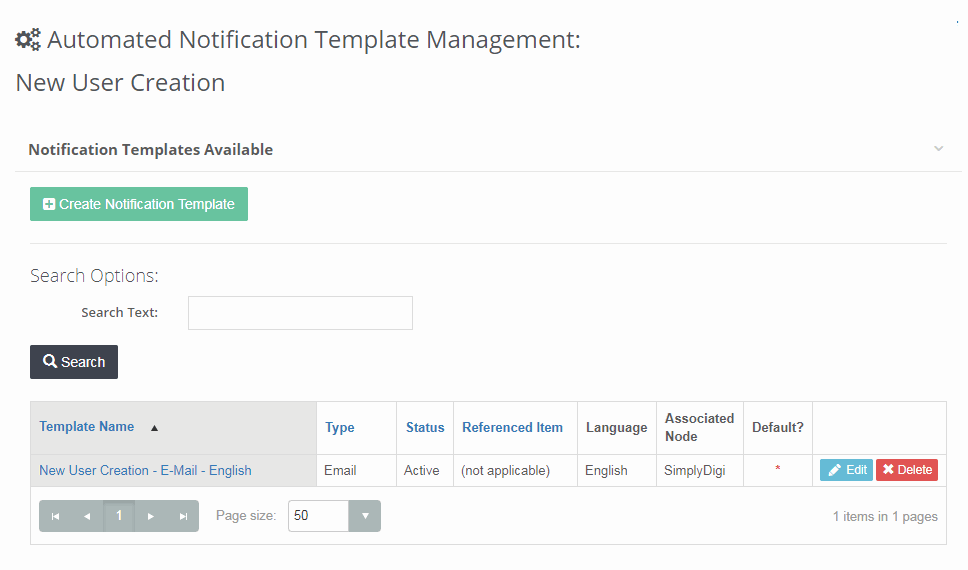
Let's look at the fields and options on the page:
| Field/Option | Description |
|---|---|
| Create Notification Template | Clicking this link opens the Configure Automated Notification page where you can create a new template. |
| Search | Enter part of the template name to search for a specific template. |
| Template Name | The name of the notification |
| Type | Either E-Mail or Message Center |
| Status | Either Active or Inactive |
| Day(s) | Also known as "trigger". This option only applies to the Due Date related notifications.
|
| Referenced Item | Shows "All Courses" or the name of the course is the notification is specific to the course. This option is only presented and available for the course related notifications. |
| Language | The language this notification is specific to. |
| Language Default? | Indicates that it is the default notification for users who have a language selection that is not covered by a specific language notification. Best Practice: Always make sure that your notifications are covered with a default. |
| Edit | Clicking this link opens the Configure Automated Notification page where you can edit the template. |
| Delete | Deletes the template. |