Admin Guide
 SCORM Module (Classic)
SCORM Module (Classic)
SCORM Module (Classic)
SCORM Module (Classic) Features
| Feature | Supported |
| SCORM 1.2 Packages | Yes |
| SCORM 2004 Packages | No |
| SCORM Package Content Updates | Yes but limited - SCORM Module (Classic) Content Update Limitations |
| LMS Timeout | Yes |
| Module Minimum Time Spent | Yes |
| Preview - SCORM Debug Tool | Yes |
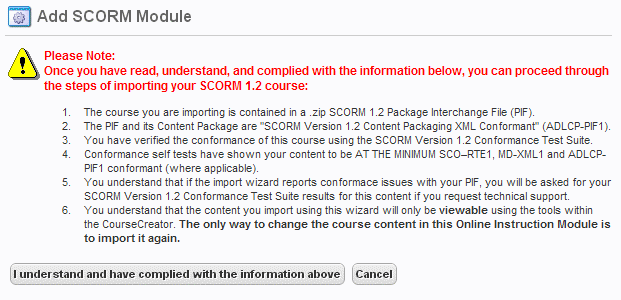
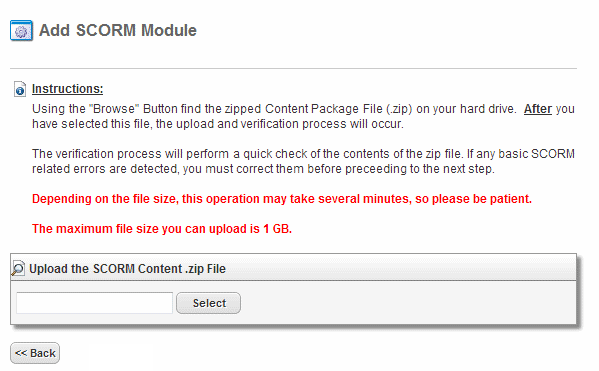
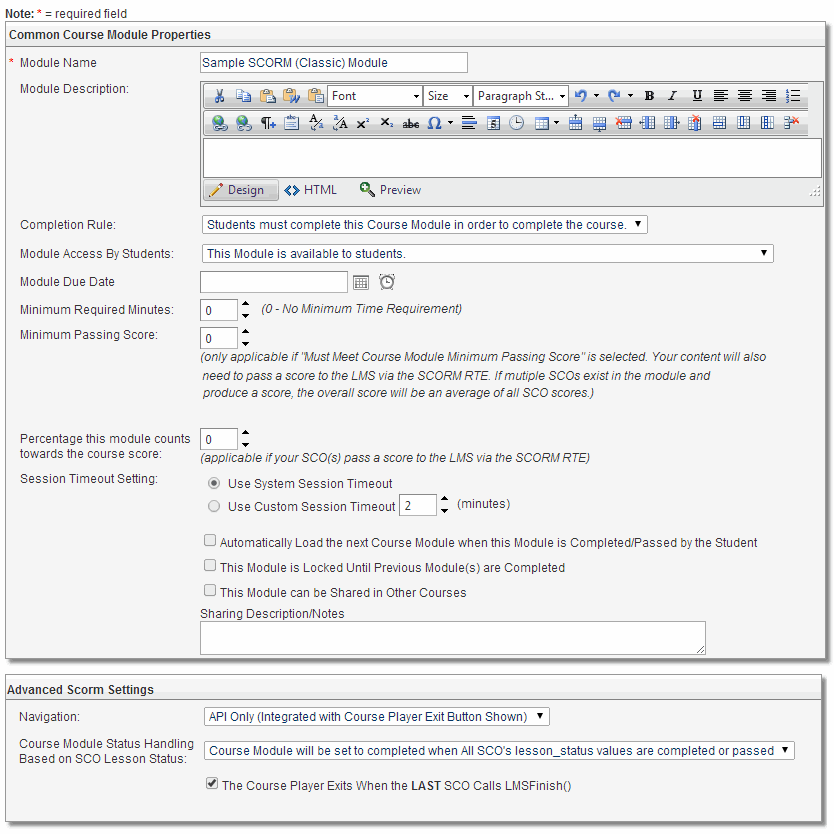
To add a new SCORM Module (Classic) to a course follow the steps below.
To learn about editing an existing SCORM Module (Classic) please see the Edit SCORM Module (Classic) section of this guide.
Creating a New SCORM Module (Classic)
Also, be aware that there is a SCORM Module (Classic) Debug Tool built into the Course Preview function. The SCORM Debug tool is very useful for advanced users who are creating their own SCORM content and need to verify that it is interacting properly with the LMS.